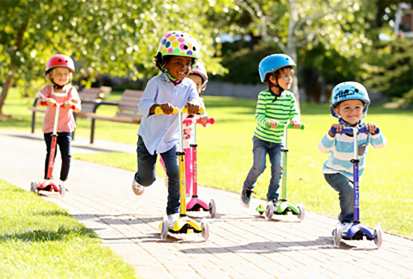
How to Draw a Scooter for Kids A Step-by-Step Guide
Drawing is a wonderful way for kids to express themselves creatively. One fun subject to draw is a scooter, a popular mode of transport that many children enjoy riding. In this article, we’ll guide you through a simple step-by-step process to draw a scooter that kids can easily follow along with. Grab your pencils, markers, or crayons, and let’s get started!
Materials Needed
Before we begin drawing, gather the following materials - Paper - Pencil - Eraser - Colored pencils, markers, or crayons
Step 1 Draw the Base
Start your scooter by drawing a long rectangle in the center of your paper. This will be the base of your scooter where a rider stands. Make sure the rectangle is slightly wider at the back to give it a stable look. You can curve the edges a bit to make it look more modern and stylish.
Step 2 Add the Wheels
Next, let’s add the wheels. Draw two circles underneath the base – one at the front and one at the back. Ensure that the wheels are the same size for balance. Try to make them a bit larger than the thickness of the base rectangle. You can add another small circle inside each wheel to create the wheel rims. These details will give your wheels a more realistic appearance.
Step 3 Draw the Scooter Handle
Now it’s time to draw the handlebar. From the front end of the base rectangle, draw two vertical lines that go straight up. These lines should be about two to three times the height of the base. Connect the top of these lines with a horizontal line to create the handlebar. You can add grips on the ends of the handlebar by drawing small rectangles or circles.
Step 4 Add the Deck
how to draw scooter for kids
To make it look more like a scooter, draw a slight upward curve at the back end of the base rectangle. This is the deck where the rider stands. Make sure to keep the front end of the deck straight for a clean look. You can also add some designs or patterns on the deck to make it more fun and colorful.
Step 5 Create Details
Now let’s add some details to your scooter! You can draw lines on the wheels to represent spokes or patterns. Add some decorations on the handlebar, like a bell or a little flag. You can also draw a small brake mechanism near the back wheel for an extra touch of realism. Remember, detail adds personality, so let your creativity flow!
Step 6 Outline Your Drawing
Once you are satisfied with your drawing, use a black marker to outline everything. This will help make your scooter pop off the page. Be careful while tracing, and if you make a mistake, don’t worry! You can always erase it later. After outlining, wait for the ink to dry before erasing any pencil marks to avoid smudging.
Step 7 Color Your Scooter
This is the fun part! Grab your colored pencils, markers, or crayons and begin coloring your scooter. You can choose bright colors like red, blue, yellow, or even your favorite color. Get creative with the colors for the wheels, handlebar, and deck. Adding some stripes or polka dots can also make your scooter unique.
Step 8 Final Touches
Once you’ve finished coloring, take a step back and look at your scooter drawing. You might want to add a background like a park, a street, or even a road with other vehicles. Adding some clouds or trees can give your drawing a lively scene.
Conclusion
Congratulations! You’ve just drawn a fantastic scooter! Drawing is all about having fun and expressing your creativity. Remember, every artist has their own style, so don’t be afraid to make adjustments or add your unique flair. Keep practicing, and soon you’ll be able to draw all sorts of cool things. Whether it’s riding around with friends or taking a trip to the park, scooters bring joy to many children. Happy drawing!

-

 Scoot&RideKids Child Kick Push Scooter 3 Wheels with LED Flashing Tilt Lean Boys Girls Scooter
- 4
$33.17 -
 Scoot&RideKids Scooter Child Kick Flashing LED Light Up 3 Wheel Push Adjustable Folding 3
- 0
$25.52 -
 Scoot&RideKids Scooter Child Kick Flashing LED Light Up 3 Wheel Push Adjustable Folding 2
- 0
$33.17 -
 Scoot&RideKids Scooter Teens Foldable Kick Push Scooter Adjustable Height Safe 2 Wheels
- 4
$49.99
Meet our partners and discover what powers their creativity!
When you register for a Lohas scooter, you will receive a 10% discount on your first order and can be notified of sales, new product launches and other offers in advance.