How to Open and Assemble the Lehuo Scooter for Kids
Scooters have become a popular choice for kids to enjoy outdoor activities while also providing an efficient way to commute around the neighborhood. One of the well-known brands in the scooter market is Lehuo, known for its sturdy design and vibrant colors that attract children. If you’ve recently purchased a Lehuo scooter for your child, you might be wondering how to open and assemble it. In this article, we’ll walk you through the steps to ensure your kid can enjoy their new ride in no time.
Step 1 Unboxing the Scooter
First things first, you'll want to carefully open the package. Make sure you have a clear workspace where you can lay out all the parts. You should find the following components in the box
- The scooter deck - Handlebars - Two front wheels and one rear wheel - A brake assembly - Screws and a small wrench or tool (if included) - A user manual
Take your time to check that all pieces are present and that there are no visible damages. If anything is missing or broken, reach out to the retailer or manufacturer for assistance.
Step 2 Identifying Parts
Before proceeding with the assembly, it’s helpful to familiarize yourself with the various parts of the scooter
- Deck This is the platform where the rider stands. - Handlebars These provide control for steering and balance. - Wheels The scooter typically has two front wheels and one back wheel. - Brake The rear wheel is equipped with a brake that helps to stop the scooter efficiently.
Step 3 Assembling the Scooter
Attaching the Handlebars
1. Align the Handlebars Take the handlebars and align them with the designated holes on the deck. Most Lehuo scooters have a clear assembly area where the handlebars can be inserted. 2. Insert Carefully insert the handlebars into the neck of the scooter deck until they are fully seated. You might hear a click indicating that they are in place.
lehuo scooter for kids how to open

3. Securing the Handlebars Use the screws provided in the package to secure the handlebars. Usually, there will be an Allen wrench or a special tool included, making this step easier. Tighten the screws adequately, but be careful not to over-tighten and strip the screws.
Attaching the Front and Rear Wheels
1. Front Wheels Start with the two front wheels. Locate the wheel guards on the scooter deck. Push each wheel onto their respective axles. You might need to apply slight pressure to ensure they fit snugly.
2. Rear Wheel Similar to the front, attach the rear wheel onto its axle. Make sure it spins freely once attached.
3. Brake Assembly Depending on the model, some Lehuo scooters come with a brake system that requires additional assembly. If your model has this feature, refer to the user manual for step-by-step instructions.
Step 4 Final Checks
Once everything is assembled, it’s worth doing a safety check
- Ensure all screws and bolts are tightened. - Check that the wheels spin freely and are not obstructed. - Test the brake to confirm it engages and disengages properly. - Make sure the handlebars are secure and do not wobble.
Step 5 Safety Gear and Ready to Ride!
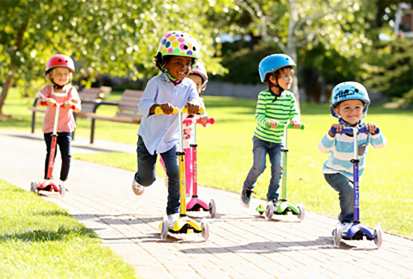
Before allowing your child to ride their new Lehuo scooter, emphasize the importance of safety gear. Make wearing a helmet a priority, as well as pads for the knees and elbows. These protective measures can help prevent injuries during falls.
Conclusion
With the scooter now assembled and safety gear on, your child is ready to take on the adventures ahead! Riding a scooter not only keeps kids active but also enhances their coordination and balance. Just remember, supervision is key, especially for younger riders. Enjoy the outdoors together, as the joy of riding is meant to be shared!

-

 Scoot&RideKids Child Kick Push Scooter 3 Wheels with LED Flashing Tilt Lean Boys Girls Scooter
- 4
$33.17 -
 Scoot&RideKids Scooter Child Kick Flashing LED Light Up 3 Wheel Push Adjustable Folding 3
- 0
$25.52 -
 Scoot&RideKids Scooter Child Kick Flashing LED Light Up 3 Wheel Push Adjustable Folding 2
- 0
$33.17 -
 Scoot&RideKids Scooter Teens Foldable Kick Push Scooter Adjustable Height Safe 2 Wheels
- 4
$49.99
Meet our partners and discover what powers their creativity!
When you register for a Lohas scooter, you will receive a 10% discount on your first order and can be notified of sales, new product launches and other offers in advance.