STIGA Scooter Mini Kid 3W Rosa Assembly Guide and Tips
The STIGA Scooter Mini Kid 3W Rosa is an excellent choice for young riders looking to enjoy the thrill of scooting while developing their balance and coordination skills. Designed for children, this scooter combines safety, durability, and fun, making it an ideal gift for any child. In this article, we will guide you through the assembly process of the STIGA Scooter Mini and provide useful tips to ensure a smooth and enjoyable experience.
Unboxing Your STIGA Scooter Mini
When you first open the box, you will find several components that make up the scooter. Typically, you should see - The scooter deck - The handlebar - Two front wheels - One rear wheel - A set of screws and tools
Before you start assembling, double-check that all parts are included. If anything is missing, refer to the packaging to ensure nothing has been overlooked.
Step-by-Step Assembly Instructions
Step 1 Attach the Front Wheels
Begin by attaching the two front wheels to the scooter deck. Locate the wheel mounts on the front ends of the scooter deck. Take the wheel axles and insert them through the holes of the wheels, then align the wheels with the mounts. Secure the wheels in place by tightening the provided screws using the included tool. Make sure that the wheels spin freely but are also secure enough to prevent wobbling.
Step 2 Install the Rear Wheel
The rear wheel typically requires a different installation process. Position the rear wheel at the designated mount on the back of the scooter deck. Similar to the front wheels, insert the axle through the wheel and secure it with screws. Again, ensure that the wheel is properly aligned and can spin without obstruction.
Step 3 Assemble the Handlebar
Next, it’s time to install the handlebar. Insert the handlebar pole into the designated slot at the front of the deck. Most STIGA scooters come with a mechanism for adjusting the height of the handlebar, which is especially important for accommodating growing children. Secure the handlebar using the provided screws, ensuring that it is firmly attached and will not wobble during rides.
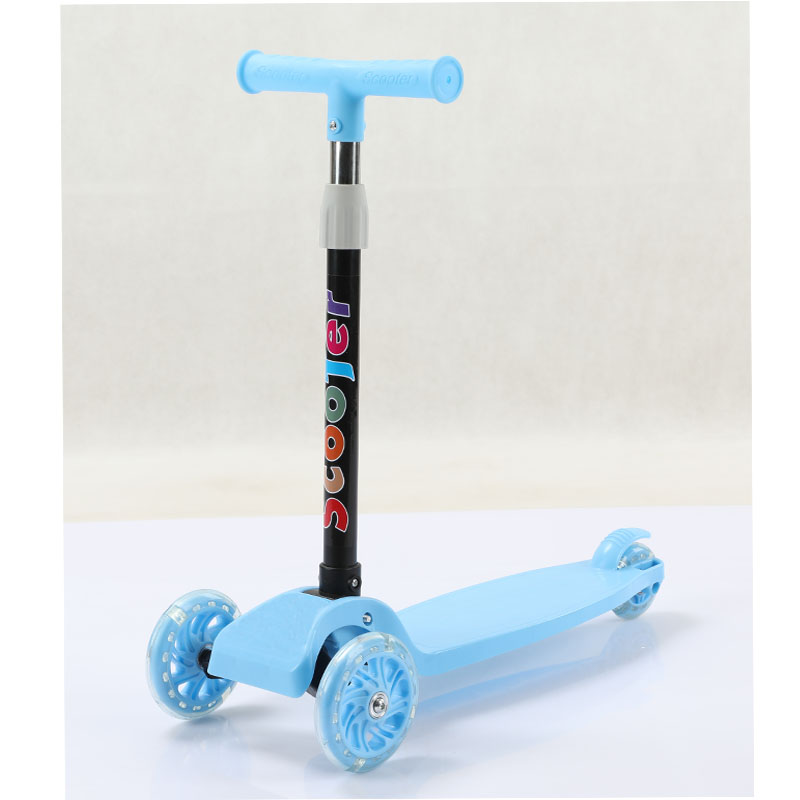
stiga scooter mini kid 3w rosa montering
Step 4 Final Adjustments
Once all components are assembled, carefully check each connection point to make sure everything is tight and secure. A small wiggle test can help verify the sturdiness of the scooter. If you notice any loose parts, use the tools provided in the package to tighten them.
Safety Tips for New Riders
After assembling the STIGA Scooter Mini Kid 3W Rosa, it’s essential to keep safety in mind as your child begins to ride
1. Wear Protective Gear Encourage your child to wear a helmet, knee pads, and elbow pads. Safety gear is vital in preventing injuries during any fall or mishap.
2. Choose the Right Environment Start scooting in a spacious area with a flat surface. Avoid busy streets and uneven terrain until your child is more confident.
3. Supervision Adult supervision is crucial, especially for younger children. Ensure they understand safety rules and can follow them while riding.
4. Practice Balance Invite your child to practice balancing on the scooter before riding. This will give them confidence and help reduce the risk of falling.
5. Follow Weight Limit Guidelines Make sure the scooter’s weight limit is respected. Overloading can lead to accidents or damage to the scooter.
Conclusion
Assembling the STIGA Scooter Mini Kid 3W Rosa can be a fun and rewarding activity that paves the way for fantastic outdoor adventures. Following these simple assembly instructions and safety tips will help ensure that your child enjoys a safe and exciting riding experience. The joy of scooting is just a few steps away, so buckle up, hit the pavement, and enjoy the ride!

-

 Scoot&RideKids Child Kick Push Scooter 3 Wheels with LED Flashing Tilt Lean Boys Girls Scooter
- 4
$33.17 -
 Scoot&RideKids Scooter Child Kick Flashing LED Light Up 3 Wheel Push Adjustable Folding 3
- 0
$25.52 -
 Scoot&RideKids Scooter Child Kick Flashing LED Light Up 3 Wheel Push Adjustable Folding 2
- 0
$33.17 -
 Scoot&RideKids Scooter Teens Foldable Kick Push Scooter Adjustable Height Safe 2 Wheels
- 4
$49.99
Meet our partners and discover what powers their creativity!
When you register for a Lohas scooter, you will receive a 10% discount on your first order and can be notified of sales, new product launches and other offers in advance.